Task:1
Chapter 7:
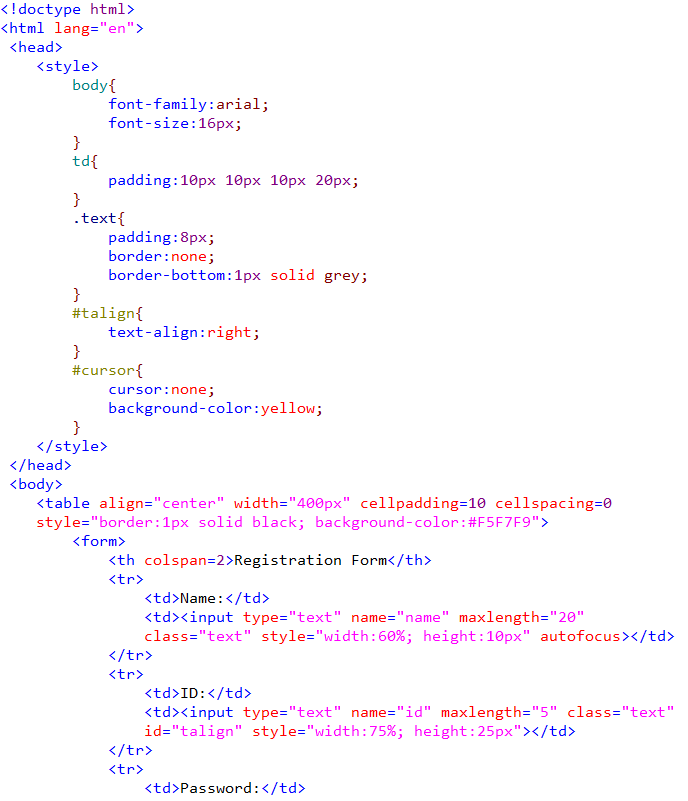
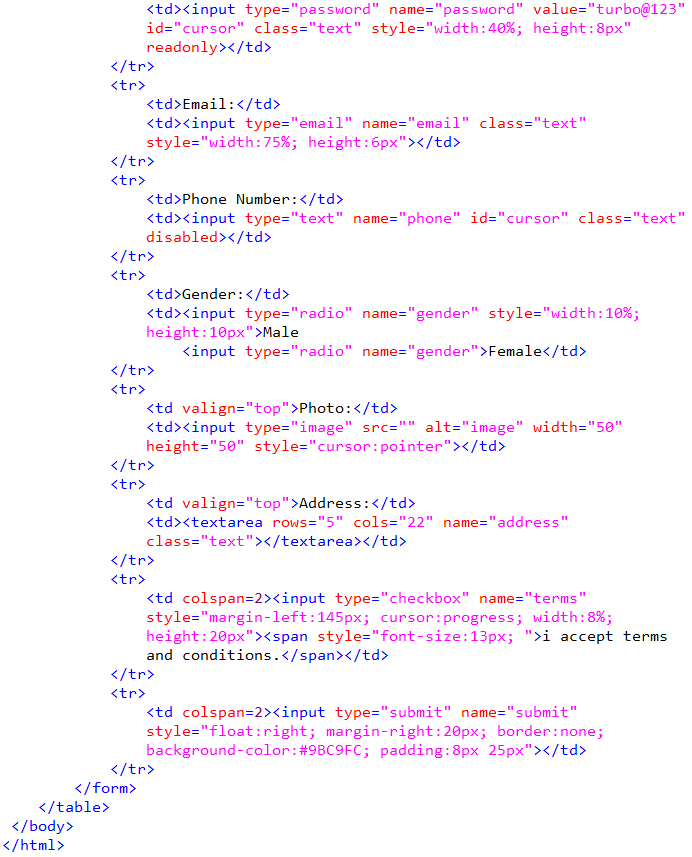
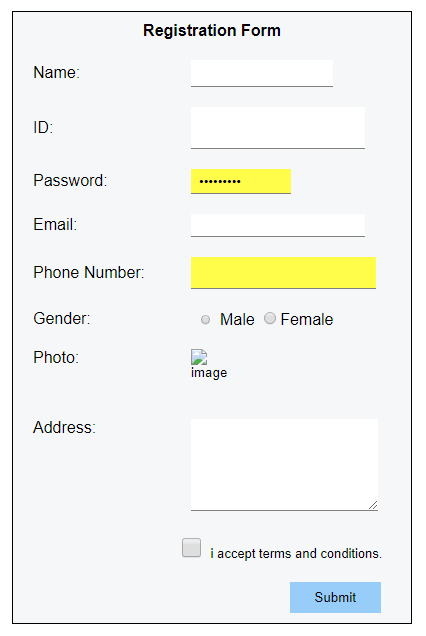
1. Text box text align: Align the text box text to left and right.
2. Height: Apply 4 different heights to 4 different types of input controls
3. Width: Apply 4 different width to 4 different types of input controls
4. Mouse Cursor for button: Apply Hand cursor for image and button. And not allowed for readonly and disabled controls.
Steps:
1. Create a table and align it as center.
2. Take width as 300px, cellpadding is 10, cellspacing is 0 and use some css properities like border and background color.
3. Create a form with in a table and create table heading with <th> tag.
4. Create some input fields like text, password, radio, checkbox and submit button.
5. Use readonly and disabled attributes and set cursor as none when it place on this text field.
6. Set width and height attributes to input type image.
Code:
Output:
Task 2:
Chapter 8: Simple select box with list of btech branches
1. Select Attribute: Basic info and use
2. Select and Option tag: Set multiple options
3. ID, Name, Class: use default and base attributes
Steps:
1. Create a table and align it as center.
2. Create a form within the table and give cellpadding and cellspacing is 0.
3. Create a select and option tag.
4. Give some options to the select and option tag.
5. Create class and id to the both td and input type tags.
6. Using style give properties to the name,class and id.
Code:


Output:


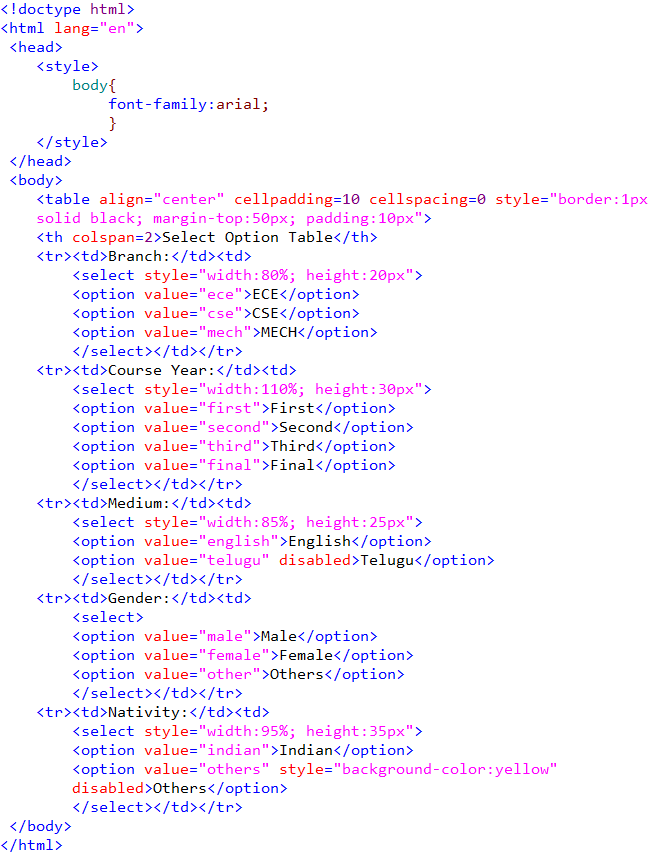
2. Size
3. Disabled : design 2 select box with one disabled = on and one with disabled = off
3. Create select and option tag with five different categories with different sizes.
4. Disable two options from two different select boxes.
5. Highlight the disabled option wiht background-color.
Code:
Output:

2. Give border : Give border to the Select Box with different sizes and one text box with no border
3. Border color: give different border color to 4 different sizes of input elements
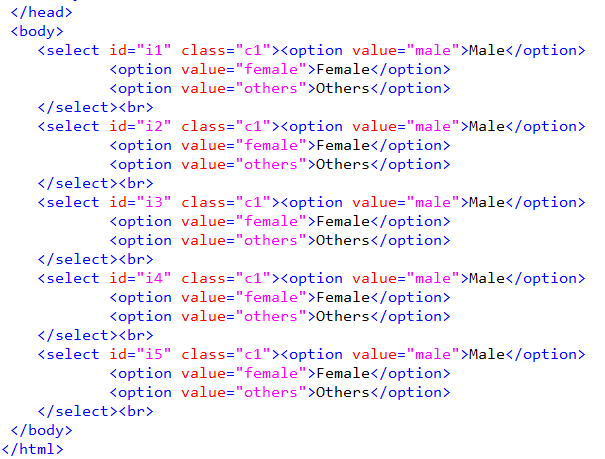
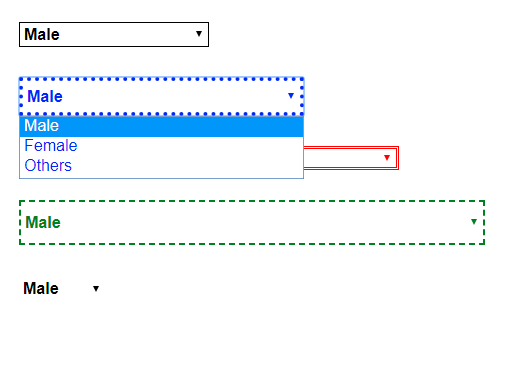
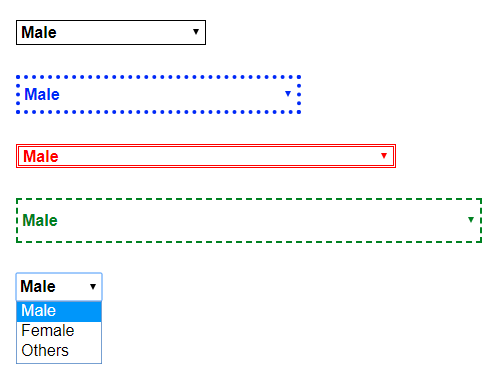
2. Create five different ids to five different select boxes and same class for all select boxes.
3. Give different types of borers to select boxes using border properties with size and color.
4. Change width and height of select boxes by using width and height properties in css.
5. By using class, change the font style, font size, font weight and margin.
Code:

Output:
2. Rows: 2 Textareas one with 5cols and another with 8 rows
3. Cols: 2 Textareas one with 5rows and another with 8 Cols
1. Create a table using table tag and give cellspacing is 0 and cellpadding is 10.
2. Create four textareas with different sizes by keeping different sizes of cols and rows.
3. Make changes on font and padding.
Code:

Output:

2. Apply other attributes of Input we discussed in Chapter 4,5
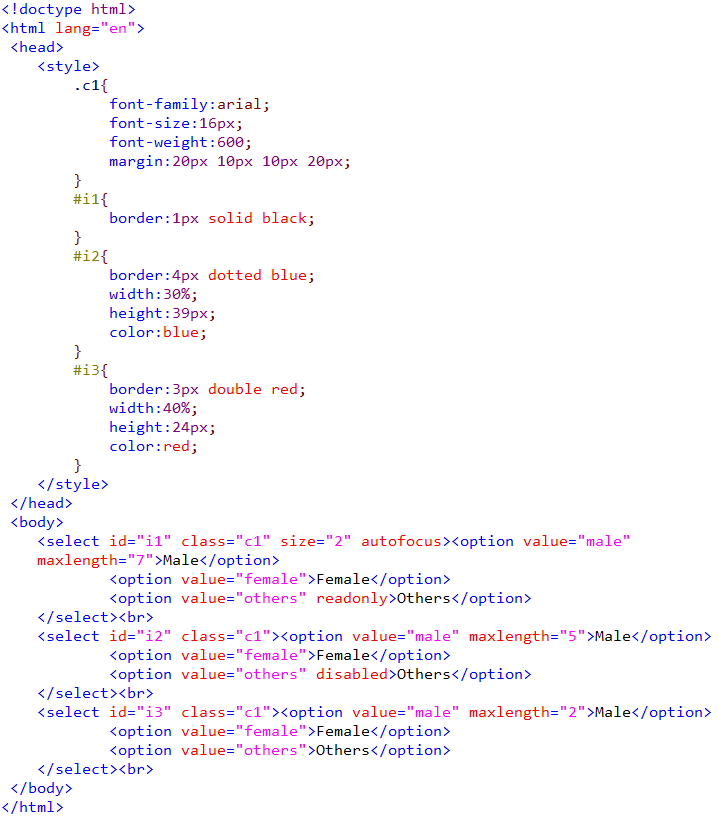
1. Create three select boxes using select tag and enter three options for each select box by using option tag.
2. Apply attributes like size, readonly, disabled and autofocus to the option values.
3. Apply properties like border, width, height and color to the select boxes.
4. Make changes over the font styles and margin.
Code:
Output:


1. Create a table using table tag and make its cellspacing is 0, cellpadding is 10 and give a background-color.
2. First column of table specifies that the name of the input field and second column for input field i.e. textarea.
3. Create three text areas using textarea tag with different cols and rows.
4. Use all css properties like color, background-color, font-family, font-size, font-weight, text-align, border, border-radius etc. over this textarea.
Code:


Output:

2. Submit button
3. Reset Button
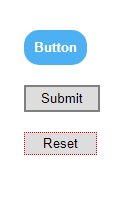
1. Create a table and give cellpadding, cellspacing and margin.
2. Create a normal button using button tag and apply some properties like padding, border, color and background-color.
3. Create a submit button using input type=submit and make changes on padding and border.
4. Create a reset button using input type=reset and give padding and border.
Code:

Output:
2. Value: check how it read the value
3. Disabled: display 2 button one with enabled and another with disabled
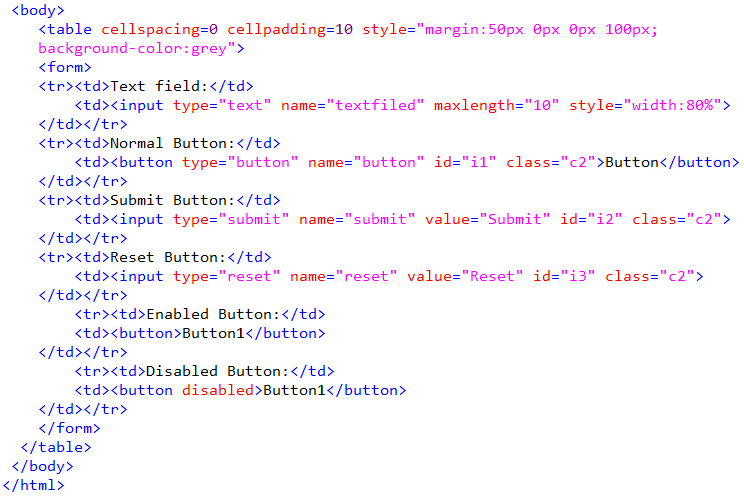
1. Create a table and apply cellpadding, cellspacing, margin and background-color.
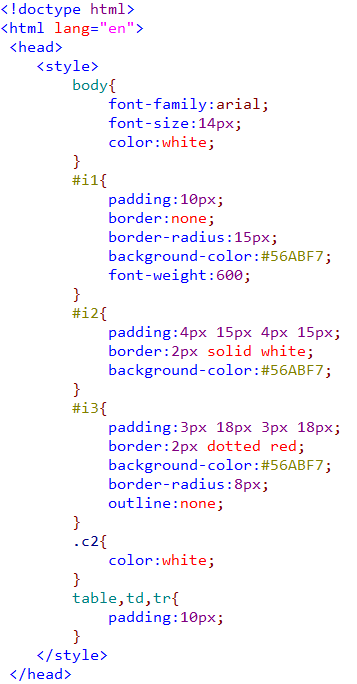
2. Create a text field for taking input text with limited maxlength and width.
3. Create a normal button by using button tag and remove its border and change its background-color.
4. Create a submit button using input type=submit and change its border color, text color, background-color.
5. Create a reset button using input type=reset and change its border to dotted and color is red.
6. Create two buttons, in this one button is enabled and another one is disabled.
Code:
Output:

2. Color: Change the button color and button background color
1. Create a table and make it as center by giving align=”center” attribute.
2. Change its structure by giving cellspacing, cellpadding, background-color and border-radius.
3. Create a form and create three buttons using input type=button tag.
4. Create different ids for each button and same class for all three buttons.
5. By using ids change button color and background-color and border styles.
6. By using class change its padding and font-weight.


Chapter 7:
1. Text box text align: Align the text box text to left and right.
2. Height: Apply 4 different heights to 4 different types of input controls
3. Width: Apply 4 different width to 4 different types of input controls
4. Mouse Cursor for button: Apply Hand cursor for image and button. And not allowed for readonly and disabled controls.
Steps:
1. Create a table and align it as center.
2. Take width as 300px, cellpadding is 10, cellspacing is 0 and use some css properities like border and background color.
3. Create a form with in a table and create table heading with <th> tag.
4. Create some input fields like text, password, radio, checkbox and submit button.
5. Use readonly and disabled attributes and set cursor as none when it place on this text field.
6. Set width and height attributes to input type image.
Code:
Output:
Task 2:
Chapter 8: Simple select box with list of btech branches
1. Select Attribute: Basic info and use
2. Select and Option tag: Set multiple options
3. ID, Name, Class: use default and base attributes
Steps:
1. Create a table and align it as center.
2. Create a form within the table and give cellpadding and cellspacing is 0.
3. Create a select and option tag.
4. Give some options to the select and option tag.
5. Create class and id to the both td and input type tags.
6. Using style give properties to the name,class and id.
Code:
Output:
Task:3
Chapter 9: Design the 3 select box with different sizes
1. Width2. Size
3. Disabled : design 2 select box with one disabled = on and one with disabled = off
Steps:
1. Create a table and align it as center.
2. Create table heading and give cellpadding and cellspacing to the table.3. Create select and option tag with five different categories with different sizes.
4. Disable two options from two different select boxes.
5. Highlight the disabled option wiht background-color.
Code:
Output:
Task:4
Chapter 10: Apply the styles
1. Apply css using id and class: Use ID and class to apply different styles2. Give border : Give border to the Select Box with different sizes and one text box with no border
3. Border color: give different border color to 4 different sizes of input elements
Steps:
1. Create five select boxes and give its option values.2. Create five different ids to five different select boxes and same class for all select boxes.
3. Give different types of borers to select boxes using border properties with size and color.
4. Change width and height of select boxes by using width and height properties in css.
5. By using class, change the font style, font size, font weight and margin.
Code:
Output:
Task:5
Chapter 11: Design one textarea to enter address
1. Textarea: <textarea> tag2. Rows: 2 Textareas one with 5cols and another with 8 rows
3. Cols: 2 Textareas one with 5rows and another with 8 Cols
Steps:
2. Create four textareas with different sizes by keeping different sizes of cols and rows.
3. Make changes on font and padding.
Code:
Output:
Task:6
Chapter 12: Design the 3 select box with different sizes
1. Maxlength: GIve maxlength 100 to char2. Apply other attributes of Input we discussed in Chapter 4,5
Steps:
1. Create three select boxes using select tag and enter three options for each select box by using option tag.
2. Apply attributes like size, readonly, disabled and autofocus to the option values.
3. Apply properties like border, width, height and color to the select boxes.
4. Make changes over the font styles and margin.
Code:
Output:
Task:7
Chapter 13: Apply the styles
1. Apply all the Css of input control to text area.
Steps:
1. Create a table using table tag and make its cellspacing is 0, cellpadding is 10 and give a background-color.
2. First column of table specifies that the name of the input field and second column for input field i.e. textarea.
3. Create three text areas using textarea tag with different cols and rows.
4. Use all css properties like color, background-color, font-family, font-size, font-weight, text-align, border, border-radius etc. over this textarea.
Code:
Output:
Task:8
Chapter 14: Display 3 Different Types of buttons normal click button, submit button, reset/cancel button
Button: Different Types of buttons
1. Normal button2. Submit button
3. Reset Button
Steps:
1. Create a table and give cellpadding, cellspacing and margin.
2. Create a normal button using button tag and apply some properties like padding, border, color and background-color.
3. Create a submit button using input type=submit and make changes on padding and border.
4. Create a reset button using input type=reset and give padding and border.
Code:
Output:
Task:9
Chapter 15: Display 3 button and apply the below attributes:
1. Name, ID, Class: Default attributes2. Value: check how it read the value
3. Disabled: display 2 button one with enabled and another with disabled
Steps:
1. Create a table and apply cellpadding, cellspacing, margin and background-color.
2. Create a text field for taking input text with limited maxlength and width.
3. Create a normal button by using button tag and remove its border and change its background-color.
4. Create a submit button using input type=submit and change its border color, text color, background-color.
5. Create a reset button using input type=reset and change its border to dotted and color is red.
6. Create two buttons, in this one button is enabled and another one is disabled.
Code:
Output:
Task:10
Chapter 16: Apply the styles
1. Apply css using id and class: Use ID and class to apply different styles2. Color: Change the button color and button background color
Steps:
1. Create a table and make it as center by giving align=”center” attribute.
2. Change its structure by giving cellspacing, cellpadding, background-color and border-radius.
3. Create a form and create three buttons using input type=button tag.
4. Create different ids for each button and same class for all three buttons.
5. By using ids change button color and background-color and border styles.
6. By using class change its padding and font-weight.
Code:
Output: